
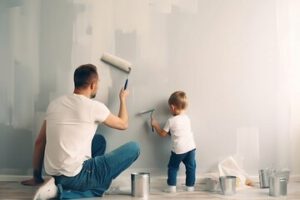
Painting walls can create an entirely new look and feel for a room. Trends come and go, but a fresh coat of paint can give a room a facelift that can last for years. Visit Website to learn more.
Professional interior painters use various techniques to make a room stand out and create a focal point. Some of these special wall treatments include:
Wall stenciling is a wonderful way to add an artistic touch to your interior painting project. You can choose from a variety of designs, ranging from florals to animals and geometric patterns. The most important thing to remember when using stencils on walls is that you need to prepare the surface before you start. The surface should be clean, dry and free from debris. Then, you should apply the correct exterior paint for the area.
Once the base coat has dried, you can begin to stencil. Begin with a small area or section of the wall to get a feel for it. Stenciling on walls can take a lot of time, so it’s best to tackle one area at a time. This allows you to focus on the task at hand and not get overwhelmed by the project ahead of you.
You can use a wide variety of tools to stencil your wall. Some people prefer to use a brush, while others like to use a roller. The key is to find a tool that you can easily handle. Once you’ve chosen a brush or roller, load it with paint. You want to make sure that the paint is loaded evenly and doesn’t run under the stencil. The best technique to achieve this is to “pounce” or roll the tool across the wall with a light pressure. This will give you a smooth, even coat.
You can stencil your wall with a lot of different tools. While some people appreciate using rollers, others would rather use brushes. Selecting a tool that you can readily handle is crucial. Fill the brush or roller with paint after selecting it. Make sure the paint is loaded uniformly and does not flow underneath the stencil. Rolling the tool across the wall with light pressure, or “pounceing,” is the most effective way to accomplish this. You’ll get an even, smooth coat as a result.
Once you have applied the paint to all of the open areas of your stencil, you can then begin to peel it up. It may be a bit scary at first, but it’s important to do this so that you don’t paint over the entire design.
You can also try stippling with your stencil brush, which will help you achieve sharp, crisp lines. When you’re finished, the final result will be an accent wall that is both beautiful and unique. This technique isn’t for beginners, but it can be rewarding once you learn the tricks of the trade.
Like sponging, rag rolling is an additive technique that creates a richly textured look. But whereas sponging produces a random effect, rag rolling offers more of a controlled and structured look that’s often used to add pattern underneath stenciling. Rag rolling gives surfaces a dramatic appearance that mimics crushed velvet, parchment or chamois leather. It’s a great way to bring color and texture into rooms without the expense of new flooring or furniture.
To begin a rag rolling project, apply a base coat of your desired True Value EasyCare Ultra Premium interior paint and let it dry completely. Next, pour a small amount of your secondary glaze color into a separate bucket. Dip a clean, lint-free rag into the glaze and saturate it well. This step is very important to prevent wet glaze from getting on wall surfaces that are yet to be rolled or have already been rolled. It’s best to use a rag made from linen, but other types of natural fiber rags will also work just as long as they are lint-free and clean.
While the surface is still wet, grab your rag and begin working it into the glaze in about a 2 foot area at a time. Be sure to rotate your wrist and vary the shape of the rag to avoid overly heavy blots. Rinse the rag occasionally to refresh its saturation.
After you’ve gotten your groove down, switch to a new section of the wall. Remember to use a smaller rag for corners and tight spaces that the larger rag will struggle with. You can also use a brush dipped in the glaze to fill in any nooks and crannies that the rag won’t reach.
Keep in mind that rag rolling is very time-consuming. For this reason, it’s best to stick with it in smaller areas like bathroom or kitchen accent walls. For larger projects, a skilled professional is the better choice. However, if you’re comfortable with this painting technique and have the time to devote to it, a rag rolling project will make for a beautiful, dramatic room addition.
Letters painted freehand can give a sign a more personal touch. It takes practice to achieve the spacing and font size needed, but can be done with a little time and effort. It is important to work in a well-ventilated area and use mineral spirits as your paint thinner. This product has toxic fumes, so it is vital to take precautions to avoid inhalation.
Start with a clean surface. Paint the edges of your letters, then sand them down for a smooth finish (if needed). If you are painting MDF letters that have wood grain, it is important to paint in the direction of the fibers. Once the sides are dry, you can start on the face of your letters. If you are unsure of your freehand skills, start with a stencil and practice on cardboard first.
The last step is to apply gold leaf to the letters. This requires a special paint known as “gold size” which has a consistency similar to enamel and appearance like yacht varnish. The oil-based paint has variable open times, so you have to act quickly before it dries too much and damages the leaf or your letters.
Checkerboard is a classic pattern that can add visual interest to any room. It’s easy to incorporate into any design style and can complement a variety of color schemes. In addition, the pattern offers a timeless aesthetic that transcends current design trends.
The checkerboard pattern consists of alternating squares of two colors, typically black and white. It’s a popular choice for flooring and architectural designs, but can also be used as a decorative accent on walls. The high-contrast look of the pattern can create a bold and striking effect, and is often associated with a sense of elegance and sophistication. The symmetrical arrangement of the squares can also convey a sense of order and control. The classic black-and-white combination is a traditional favorite, but the pattern can be customized with other color combinations to achieve a more contemporary or custom look.
Unlike striped or polka dot patterns, checkerboards can work well with a wide range of styles, from paired-back modern decor to bold maximalism. This versatility makes them a safe and nostalgic choice for novice DIYers looking to update their homes.
One way to achieve a flawless checkerboard is to start with a fresh base coat of paint. Choose your lightest shade and apply a coat to the entire wall. Allow it to dry completely before moving on to the next step.
Once the base coat is dry, begin to mark out your squares. To do this, use a carpenter’s level and low-tack tape to outline the squares you want to paint. Make sure to mark off the entire area you’re going to cover, including any trim or molding. This will prevent the second color from bleeding into the first, ensuring a clean and crisp line.
Next, fill in the outlined squares with your second color. If you’re using a solid color, paint and let it dry completely before applying the tape again. Repeat this process until you have a complete checkerboard on your wall. Once the paint is dry, remove the tape, ensuring that the lines and squares are neatly aligned.